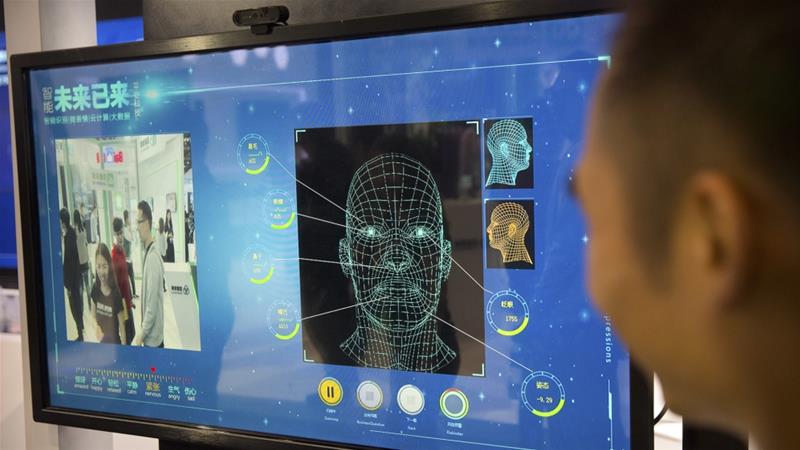


The human face has been a topic of interest for deep learning engineers for quite some time now. Understanding the human face not only helps in facial recognition but finds applications in facial morphing, head pose detection and virtual makeovers. If you are a regular user of social media apps like Instagram or Snapchat, have you wondered how the filters fit perfectly for each face? Though every face on the planet is unique, these filters seem to magically align on your nose, lips and eyes. These filters or face-swapping applications make use of facial landmarks. These landmarks are basically points that are meant to help with the identification of the distance between eyes, position of the nose, size of the lips etc. In the context of facial landmarks, our goal is to detect important facial structures on the face using shape prediction methods.
In this article, we will cover:
- Need for stabilization
- Popular types of landmark detectors
- Implementation and stabilization of 68 point landmarks for a video.
The need to Stabilize Facial Landmarks
Facial landmarks are easy to use on images since the pixels are not moving, but when it comes to a video, due to continuous motion of pixels and because of translational and rotational variances, a lot of the times these landmarks are unstable. Take a look at the image below.

Few of the points are missing out the features of the face. This can create problems for features that involve estimating the size of the face, the position of the mouth etc. This instability can affect the efficiency of the model and the results.
Popular types of landmark detectors
The Dlib library is the most popular library for detecting landmarks in the face. There are two types of detectors in this library.
- 68-point landmark detectors: This pre-trained landmark detector identifies 68 points ((x,y) coordinates) in a human face. These points localize the region around the eyes, eyebrows, nose, mouth, chin and jaw.

- 5 point landmark detector: To make things faster than the 68 point detector, dlib introduced the 5 point detector which assigns 2 points for the corners of the left eye, 2 points for the right eye and one point for the nose. This detector is most commonly used for alignment of faces.

Implementation and stabilization of 68 point landmarks for a video
Step 1: Collecting the pre-trained files.
Create a folder for your project. Create a subfolder called a model. Download the 68-points and 5-points and place them in the subfolder. Next, place this file in the root folder of your project.
Step 2: The data.
Select a short 5-10 second video for this project with good lighting. I have chosen this video. Feel free to download it from here.

Step 3: Importing the required modules
import dlib
import cv2
import numpy as np
import matplotlib.pyplot as plt
import matplotlib
import os
from google.colab import drive
drive.mount('/content/gdrive')
Copy all the downloaded files to your notebook
!cp -r '/content/gdrive/My Drive/video-stable/model' /content
!cp -r '/content/gdrive/My Drive/video-stable/videos' /content
!cp '/content/gdrive/My Drive/video-stable/faceBlendCommon.py' /content
Step 4: Convert the video into image frames and save them to a folder inside your project folder.
We will convert the entire video into individual image frames since it makes it easier to work with. Create a main folder for all the images.
def image_saver(path, filename, images):
for count in range(0, len(images)):
temp = filename + '_' + str(count) + '.png'
fn = os.path.join(path) + os.path.join(temp)
cv2.imwrite(fn, images[count])
cap=cv2.VideoCapture('/content/gdrive/MyDrive/video-stable/videos/video_data.mp4')
image_frame = []
while(cap.isOpened()):
pic, frame = cap.read()
if frame is None:
break
image_frame.append(frame)
cap.release()
plt.imshow(image_frame[0][:,:,::-1])

Now that we have the image frames, we will save all these frames in a folder.
directory = "dataset"
parent = "/content/gdrive/My Drive/video-stable/"
path = os.path.join(parent, directory)
os.mkdir(path)
os.mkdir('/content/gdrive/My Drive/video-stable/dataset/original')
image_saver('/content/gdrive/My Drive/video-stable/dataset/original/', 'frame', image_frame)
Step 5: Facial alignment
This is an important step in the process. We will use the 5 point detector for aligning the face to the frame to eliminate noise from the background and focus only on the face.
modelroot = '/content/gdrive/My Drive/video-stable/model/'
five_point_landmark = modelroot + "shape_predictor_5_face_landmarks.dat"
detect_face = dlib.get_frontal_face_detector()
detect_landmark = dlib.shape_predictor(five_point_landmark)
Now we will make use of the built in methods of the face blend common to get the detectors and align the face.
import faceBlendCommon as fb
def facial_alignment(image):
faceRects = detect_face(image, 0)
print("Number of faces detected: ",len(faceRects))
points = fb.getLandmarks(detect_face, detect_landmark, image)
print('length of points is', points)
landmarks = np.array(points)
print('after np array',len(landmarks))
image = np.float32(image)/255.0
height = 600
width = 600
if len(landmarks) > 0:
normalize_image, landmarks = fb.normalizeImagesAndLandmarks((height, width), image, landmarks)
normalize_image= np.uint8(normalize_image*255)
return normalize_image
else:
return image
aligned_faces = []
print('performing alignment')
for count in range(0, len(image_frame)):
frame = image_frame[count]
alignment = facial_alignment(frame)
aligned_faces.append(alignment)
print('Done!')
Let us check one of the images before saving it.
plt.imshow(aligned_faces[50][:,:,::-1])
plt.title("Aligned Image")
plt.show()

As you can see the background noise has been eliminated and the face has been resized to 600×600 after alignment. Save the aligned images in your images folder.
os.mkdir('/content/gdrive/My Drive/video-stable/dataset/aligned_faces')
image_saver('/content/gdrive/My Drive/video-stable/dataset/aligned_faces/', 'align_face', aligned_faces)
Step 6: Using the 68 point detector and performing stabilization
MODEL_PATH = '/content/gdrive/My Drive/video-stable/model/'
PREDICTOR_PATH = MODEL_PATH + "shape_predictor_68_face_landmarks.dat"
RESIZE_HEIGHT = 480
NUM_FRAMES_FOR_FPS = 100
SKIP_FRAMES = 1
detector = dlib.get_frontal_face_detector()
landmarkDetector = dlib.shape_predictor(PREDICTOR_PATH)
Now, we will calculate the distance between each eye using the function below
def interEyeDistance(predict):
leftEyeLeftCorner = (predict[36].x, predict[36].y)
rightEyeRightCorner = (predict[45].x, predict[45].y)
distance = cv2.norm(np.array(rightEyeRightCorner) - np.array(leftEyeLeftCorner))
distance = int(distance)
return distance
In order to save the points of detection we create separate lists.
points=[]
pointsPrev=[]
pointsDetectedCur=[]
pointsDetectedPrev=[]
all_stabilized_frames=[]
Next, we set the parameters required for the process and perform the stabilization
eyeDistanceNotCalculated = True
eyeDistance = 0
isFirstFrame = True
fps = 10
showStabilized = False
count =0
while(True):
if (count==0):
t = cv2.getTickCount()
ret,im = cap.read()
if im is None:
break
imDlib = cv2.cvtColor(im, cv2.COLOR_BGR2RGB)
imGray = cv2.cvtColor(im, cv2.COLOR_BGR2GRAY)
imGrayPrev = imGray
height = im.shape[0]
IMAGE_RESIZE = float(height)/RESIZE_HEIGHT
imSmall = cv2.resize(im, None, fx=1.0/IMAGE_RESIZE, fy=1.0/IMAGE_RESIZE,interpolation = cv2.INTER_LINEAR)
imSmallDlib = cv2.cvtColor(imSmall, cv2.COLOR_BGR2RGB)
if (count % SKIP_FRAMES == 0):
faces = detector(imSmallDlib,0)
if len(faces)==0:
print("No face detected")
else:
for i in range(0,len(faces)):
print("face detected")
newRect = dlib.rectangle(int(faces[i].left() * IMAGE_RESIZE),
int(faces[i].top() * IMAGE_RESIZE),
int(faces[i].right() * IMAGE_RESIZE),
int(faces[i].bottom() * IMAGE_RESIZE))
landmarks = landmarkDetector(imDlib, newRect).parts()
if (isFirstFrame==True):
pointsPrev=[]
pointsDetectedPrev = []
[pointsPrev.append((p.x, p.y)) for p in landmarks]
[pointsDetectedPrev.append((p.x, p.y)) for p in landmarks]
else:
pointsPrev=[]
pointsDetectedPrev = []
pointsPrev = points
pointsDetectedPrev = pointsDetectedCur
points = []
pointsDetectedCur = []
[points.append((p.x, p.y)) for p in landmarks]
[pointsDetectedCur.append((p.x, p.y)) for p in landmarks]
pointsArr = np.array(points,np.float32)
pointsPrevArr = np.array(pointsPrev,np.float32)
if eyeDistanceNotCalculated:
eyeDistance = interEyeDistance(landmarks)
print(eyeDistance)
eyeDistanceNotCalculated = False
if eyeDistance > 100:
dotRadius = 3
else:
dotRadius = 2
print(eyeDistance)
sigma = eyeDistance * eyeDistance / 400
s = 2*int(eyeDistance/4)+1
lk_params = dict(winSize = (s, s), maxLevel = 5, criteria = (cv2.TERM_CRITERIA_COUNT | cv2.TERM_CRITERIA_EPS, 20, 0.03))
pointsArr,status, err = cv2.calcOpticalFlowPyrLK(imGrayPrev,imGray,pointsPrevArr,pointsArr,**lk_params)
pointsArrFloat = np.array(pointsArr,np.float32)
points = pointsArrFloat.tolist()
for k in range(0,len(landmarks)):
d = cv2.norm(np.array(pointsDetectedPrev[k]) - np.array(pointsDetectedCur[k]))
alpha = math.exp(-d*d/sigma)
points[k] = (1 - alpha) * np.array(pointsDetectedCur[k]) + alpha * np.array(points[k])
if showStabilized is True:
for p in points:
cv2.circle(im,(int(p[0]),int(p[1])),dotRadius, (255,0,0),-1)
else:
for p in pointsDetectedCur:
cv2.circle(im,(int(p[0]),int(p[1])),dotRadius, (0,0,255),-1)
isFirstFrame = False
count = count+1
if ( count == NUM_FRAMES_FOR_FPS):
t = (cv2.getTickCount()-t)/cv2.getTickFrequency()
fps = NUM_FRAMES_FOR_FPS/t
count = 0
isFirstFrame = True
cv2.putText(im, "{:.1f}-fps".format(fps), (50, size[0]-50), cv2.FONT_HERSHEY_COMPLEX, 1.5, (0, 0, 255), 3,cv2.LINE_AA)
all_stabilized_frames.append(im)
imPrev = im
imGrayPrev = imGray
cap.release()
plt.imshow(all_stabilized_frames[1][:,:,::-1])
plt.title("Stabilized Image")
plt.show()

As you can see above, the 68 points are applied to the face. We save these images in a folder and move on the final step.
os.mkdir('/content/gdrive/My Drive/video-stable/dataset/stable_faces')
image_saver('/content/gdrive/My Drive/video-stable/dataset/stable_faces/', 'stable_face', all_stabilized_frames)
Step 7: The last step is to stitch the original, aligned and stable frames back to a video.
We will resize the frames to fit the screen and stitch the images together.
def read_all_images(dir, filename_prefix, num_files):
result_list = []
for cnt in range(0, num_files):
fn = filename_prefix + '_' + str(cnt) + '.png'
full_path = os.path.join(dir, fn)
img = cv2.imread(full_path)
result_list.append(img)
return result_list
original_frames = read_all_images('/content/gdrive/My Drive/video-stable/dataset/original', 'frame', 157)
aligned_frames = read_all_images('/content/gdrive/My Drive/video-stable/dataset/aligned_faces', 'align_face', 157)
stable_frames = read_all_images('/content/gdrive/My Drive/video-stable/dataset/stable_faces', 'stable_face', 157)
def resize_images(imageList, width, height):
result_list = []
for cnt in range(0, len(imageList)):
new_img = cv2.resize(imageList[cnt], (width, height), interpolation=cv2.INTER_AREA)
result_list.append(new_img)
return result_list
orig_frames_resized = resize_images(original_frames, 800, 800)
aligned_resized=resize_images(aligned_frames,800,800)
stab_frames_resized = resize_images(stable_frames, 800, 800)
stitched = []
for cnt in range(0, len(orig_frames_resized)):
new_img = np.hstack((orig_frames_resized[cnt], aligned_resized[cnt], stab_frames_resized[cnt]))
stitched.append(new_img)
plt.imshow(stitched_frames[50][:,:,::-1])

Let us convert these into a video.
image_saver('/content/gdrive/My Drive/video-stable/dataset/', 'stitch', stitched_frames)
from os.path import isfile, join
def convert_frames_to_video(pathIn,pathOut,fps):
frame_array = []
files = [f for f in os.listdir(pathIn) if isfile(join(pathIn, f))]
for i in range(len(files)):
filename=pathIn + files[i]
img = cv2.imread(filename)
height, width, layers = img.shape
size = (width,height)
print(filename)
frame_array.append(img)
out = cv2.VideoWriter(pathOut,cv2.VideoWriter_fourcc(*'DIVX'), fps, size)
for i in range(len(frame_array)):
out.write(frame_array[i])
out.release()
pathIn= '/content/gdrive/My Drive/video-stable/dataset/'
pathOut = '/content/gdrive/My Drive/video-stable/videos/finalvid.mp4'
fps = 30.0
convert_frames_to_video(pathIn, pathOut, fps)
Here is the final output.

The final video shows that despite movement of the lips and facial contortions, the points are stable and are adjusting according to the movement. You can check this video here.
Conclusion
In this article, we have learned the step-by-step process to stabilize the important landmark for a face in a video. In order to improve the accuracy and precision of face detection or recognition systems, the process of stabilization is very important.