|
Listen to this story
|
DataRobot is an advanced business AI platform that democratises data science and automates the end-to-end process of designing, implementing, and sustaining machine learning and artificial intelligence at scale. DataRobot, which is powered by the most recent open-source algorithms and is accessible in the cloud, on-premise, or as a fully managed AI service, provides you with the power of AI to achieve superior business outcomes. In this article, we would learn to build an end-to-end ML classifier model with DataRobot. Following are the topics to be covered.
Table of contents
- Data upload
- Selecting the model
- Computing the results
- Deploy the final model
This article will be using data related to direct market campaigning of a banking institution. Phone calls were used in the marketing activities. More than one contact with the same consumer was frequently necessary to determine if the product (bank term deposit) would be subscribed or not. We will be building a classification model that would classify the customer whether to call the customer or not.
Let’s start with uploading the data since the model can’t learn without data.
Data upload
Once registered and logged in to the DataRobot web page, there would be a page asking to select from options like data visualization, AI model building, and deployment. After selecting the page would redirect to something like this.

There are certain conditions for the data which are listed below.
- The correct file format
- Size less than 200 MB
- Minimum 20 rows
- No more than one missing column header
- No duplicate column headers
- No unsupported or inconsistent encoding
If your data file is greater than 200 MB then you need to create a job id and then it could be used since DataRobot has restricted the direct upload to 200MB.
Then click on “Data” present at the top taskbar on the web page to access the data. Once the data is uploaded the target column needs to be selected. If the target column is discrete DataRobot would generate a count plot for the categories.

Selecting the model
Once selected the target column moves to the modelling mode. In this, there are a variety of modes which are listed as quick, autopilot, manual and comprehensive.
- The quick mode is a kick-starter mode which will generate base models and could be improvised accordingly.
- The autopilot mode will build all the possible models offered by DataRobot with different cross-validation, train-test sample sizes, and feature selections.
- The manual mode is a user-defined mode which means you can select the model on your own and can train accordingly.
- The comprehensive mode is one step further than the autopilot mode. If you are not satisfied with the autopilot’s model recommendation then you can use comprehensive mode.
In this article, we are going to use the “autopilot mode”.
Once selected just click on the start button and the page would be redirected to something like this.
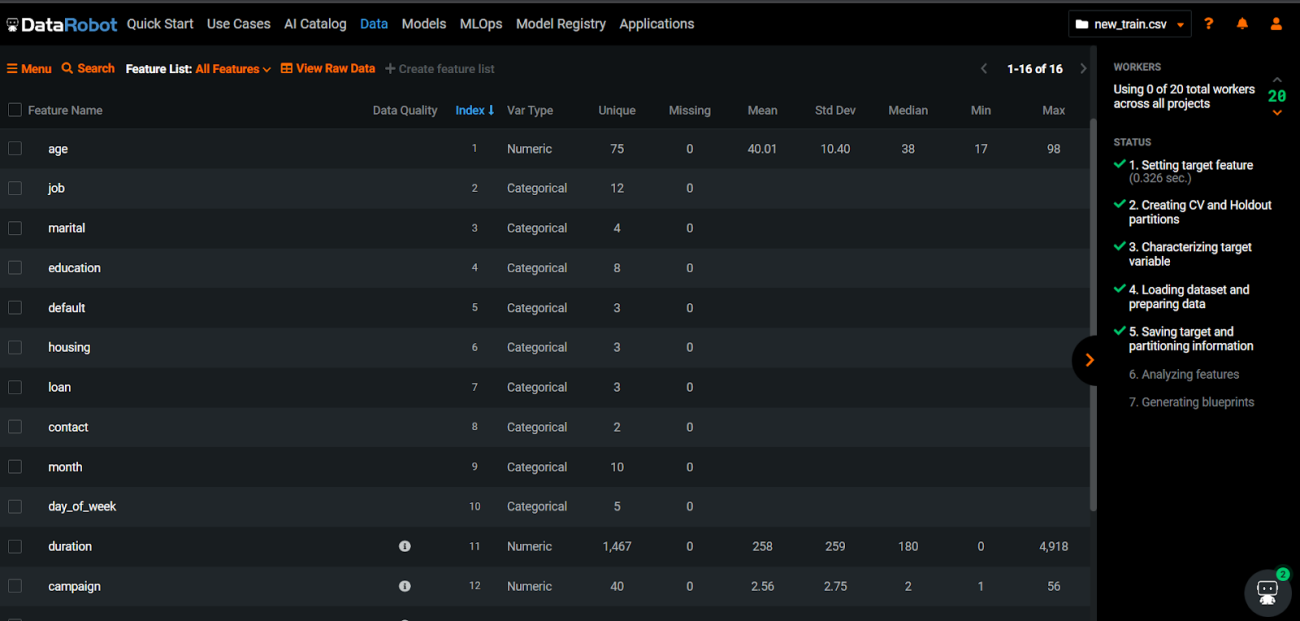
Here the data is been analyzed and you can select the number of features to be used for the training purpose. Once done with this part you can move to selecting models or depending on the mode selected earlier in the Modeling section by clicking on the “Models”.
Since we are using the autopilot mode the process of training the model will automatically initialise after the data analyses part is completed. So, we just need to sit back and wait for the process to be completed.
Computing the results
The process was initialized with 31 models. These 31 models are different versions of the base model. The base model where tree-based classifiers and linear classifiers.

At the last, there were a total of 63 models with different sample sizes, combining different tree-based algorithms and linear algorithms, different hyperparameter tuning, etc.
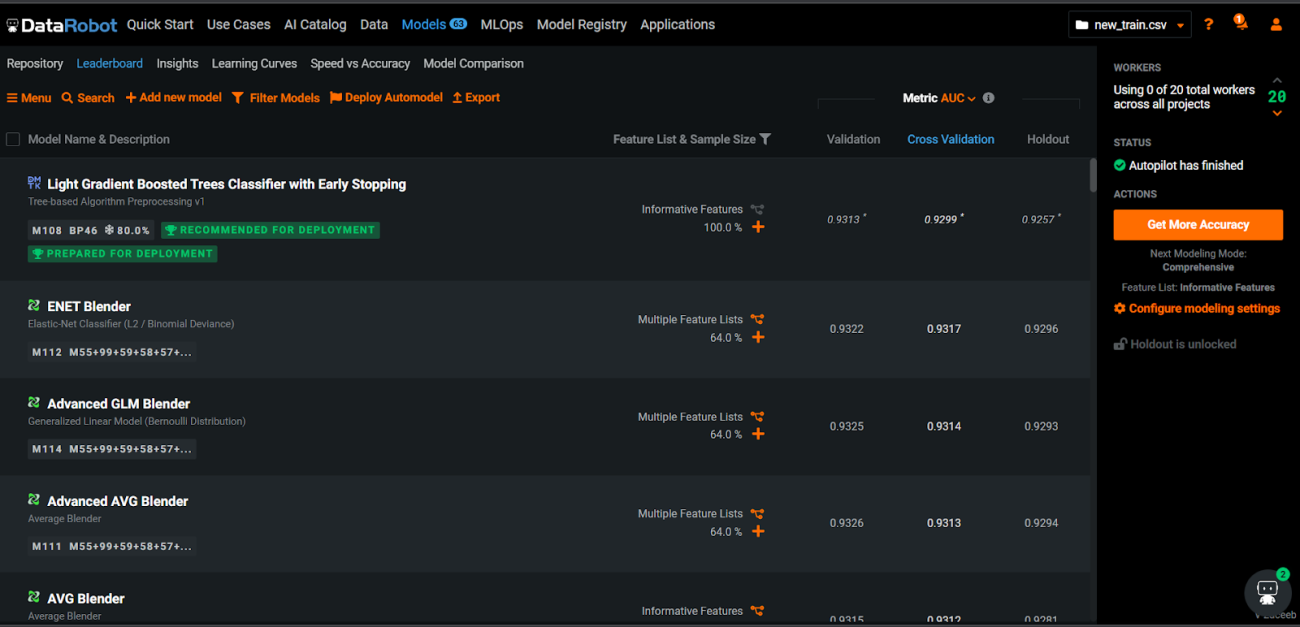
After the completion, the DataRobot’s autopilot mode recommended that the
“Light Gradient Boosted Trees Classifier with Early Stopping” is the best model to be deployed.
Let’s see the performance of the final model. By clicking on the model’s name we could see different parameters which can evaluate the performance. These parameters could help to understand the reason behind the recommendation.

Here we can see in the right panel there is a confusion matrix and below that, we have the sensitivity and precision. So, the precision is 0.52 and the sensitivity is 0.70. For this article, we are considering the rate of positively predicted values since those customers could be targeted by the sales team. On the left panel, we could see the ROC curve and AUC score of 0.92. This model is a good performing model.
Let’s analyze further by observing the processing time because when deploying a model one thing is important how fast could the model process the user inputs. A faster model with slightly low performance in prediction is better than a slower model with high performance.
If you click on the “Speed vs Accuracy” tab, a scatter plot would represent the performance with time.

The final model is the best because it is the fastest with just 67.1 milliseconds to process the data.
Now we are satisfied that the recommendation is good. Let’s deploy the model.
Deploy the final model
Deploying the model is easy just select the model from the Models tab by just clicking the checkbox beside the name of the model. Then click on the “deploy” button and the model is deployed.
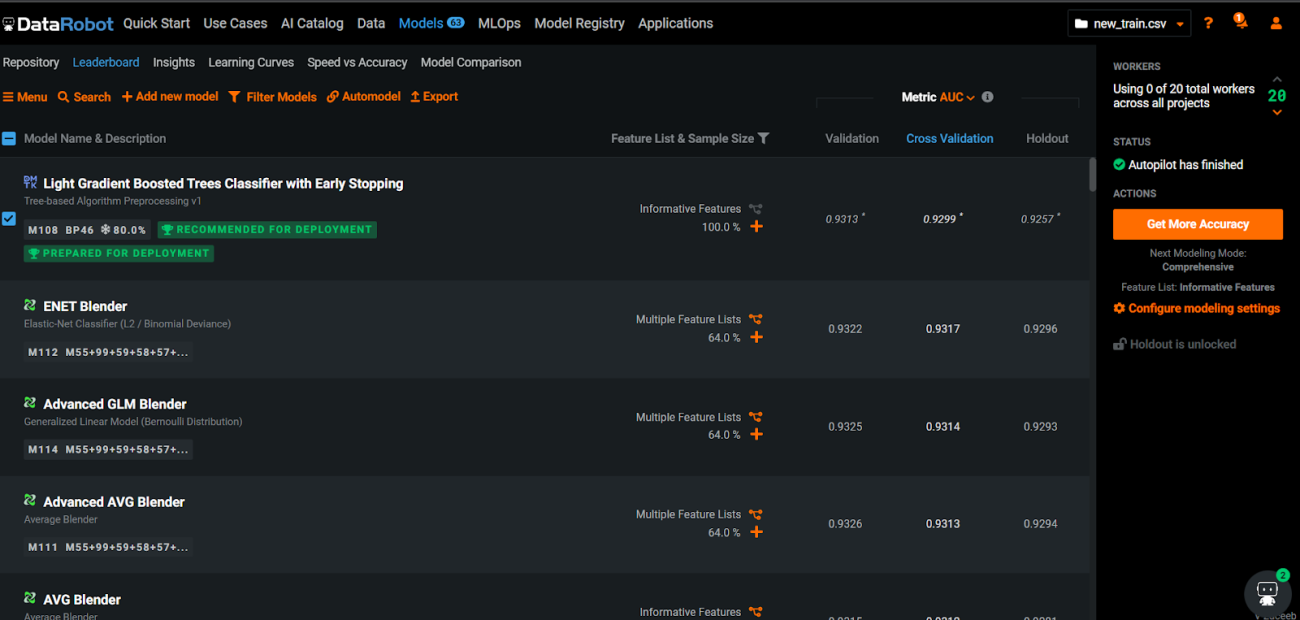
Once the model is deployed you can view the model by clicking on the “ML Ops” tab on top of the taskbar.

Conclusions
DataRobot can create predictions one at a time or in huge batches by importing a file.
Any machine learning model can be converted into an AI application using DataRobot, allowing anyone in your ecosystem to interact with the predictive insight of the underlying model. This critical application allows you to compare a forecast to historical outcomes, examine prediction reasons, and change input parameters to observe how they affect these results. With this article, we have learned to build and deploy a predictive model with DataRobot.


