|
Listen to this story
|
Working with data is different from implementing a machine learning model in production. It is essential to learn how to deploy deep learning models as offline productions to online productions, but one of the primary problems is the big size of the learned model. This article will focus on deploying an image classifier Deep Learning model with Streamlit. Following are the topics to be covered in this article.
Table of contents
- About Streamlit
- Training and Saving the DL model
- Deploying with Streamlit
Let’s start with a high-level understanding of Streamlit
About Streamlit
Streamlit is a free and open-source python framework. It allows users to quickly build interactive dashboards and machine learning web applications. There is no need for any prior knowledge about HTML, CSS and Javascript. It additionally helps hot-reloading, in order that your app can replace stay as you edit and keep your file. Adding a widget is equivalent to declaring a variable. There is no need to write a background, specify a different path, or handle an HTTP request. Easy to implement and manage. If one knows Python, then all are equipped to use Streamlit to build and share your web apps, in hours.
Are you looking for a complete repository of Python libraries used in data science, check out here.
Training and Saving the DL model
For this article, we will be using a pre-trained model due to the time constraints. The model will classify the images. The model is trained on the Imagenet Dataset with 1000 label classes. The model consists of 19 layers. These layers are divided into 16 convolution layers, 3 fully connected layers, 5 MaxPool layers and 1 SoftMax layer.
The pre-trained is VGG19 which is a 19.6 billion FLops version of Keras’ Visual Geometry Group. The VGG is a successor to the AlexNet. Below is a high-level description of the architecture of VGG19.

Let’s start with the importing of the necessary libraries.
from tensorflow.keras.applications.vgg19 import VGG19
Next, we will define the model and save the pre-trained model.
classifier = VGG19(
    include_top=True,
    weights='imagenet',
    input_tensor=None,
    input_shape=None,
    pooling=None,
    classes=1000,
    classifier_activation='softmax'
)

classifier.save("image_classification.hdf5")
Let’s start with the deployment part.
Deploying with Streamlit
Initially, we need to install the streamlit package.
!pip install -q streamlit
Create an application file and write all the codes in that file. It is a python script that will run in the background of the web application.
%%writefile app.py
import streamlit as st
import tensorflow as tf
from tensorflow.keras.applications.imagenet_utils import decode_predictions
import cv2
from PIL import Image, ImageOps
import numpy as np

@st.cache(allow_output_mutation=True)
def load_model():
  model=tf.keras.models.load_model('/content/image_classification.hdf5')
  return model
with st.spinner('Model is being loaded..'):
  model=load_model()

st.write("""
         # Image Classification
         """
         )

file = st.file_uploader("Upload the image to be classified U0001F447", type=["jpg", "png"])
st.set_option('deprecation.showfileUploaderEncoding', False)

def upload_predict(upload_image, model):

        size = (180,180)
        image = ImageOps.fit(upload_image, size, Image.ANTIALIAS)
        image = np.asarray(image)
        img = cv2.cvtColor(image, cv2.COLOR_BGR2RGB)
        img_resize = cv2.resize(img, dsize=(224, 224),interpolation=cv2.INTER_CUBIC)

        img_reshape = img_resize[np.newaxis,...]

        prediction = model.predict(img_reshape)
        pred_class=decode_predictions(prediction,top=1)

        return pred_class
if file is None:
    st.text("Please upload an image file")
else:
    image = Image.open(file)
    st.image(image, use_column_width=True)
    predictions = upload_predict(image, model)
    image_class = str(predictions[0][0][1])
    score=np.round(predictions[0][0][2])
    st.write("The image is classified as",image_class)
    st.write("The similarity score is approximately",score)
    print("The image is classified as ",image_class, "with a similarity score of",score)
The “st.cache” is used because Streamlit provides a caching mechanism. The mechanism allows the application to maintain performance when loading data from the Internet processing large data sets or performing expensive calculations.
Once the image that is needed to be classified is uploaded. The image should match the size of the input of the Keras model (224,224). To resize the image using the open cv resize function.
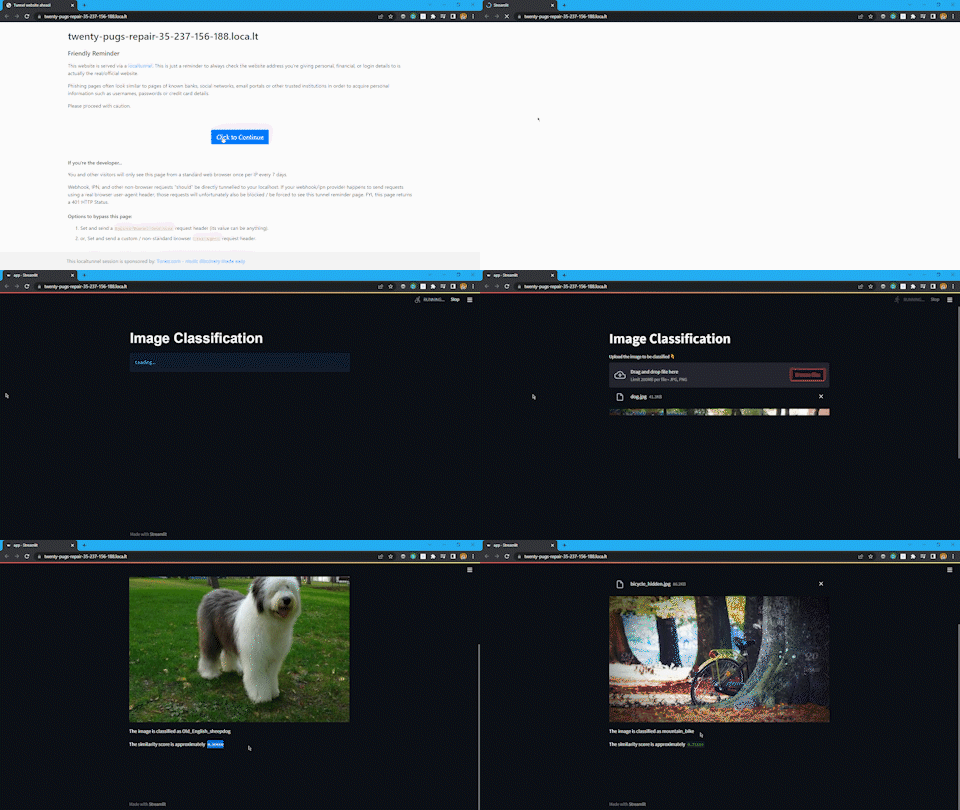
To predict the image given as an input using the predict function from TensorFlow. To decode the prediction image information using the “decode_prediction” function from Keras imagenet utility. Store the prediction results and score in a variable and to display that information use streamlit’s write function. The write function is like the print function of python.
Connect the application file to the local server. If using the google Colab research notebook use the following command. Otherwise, simply run the application file.
! streamlit run app.py & npx localtunnel –port 8501
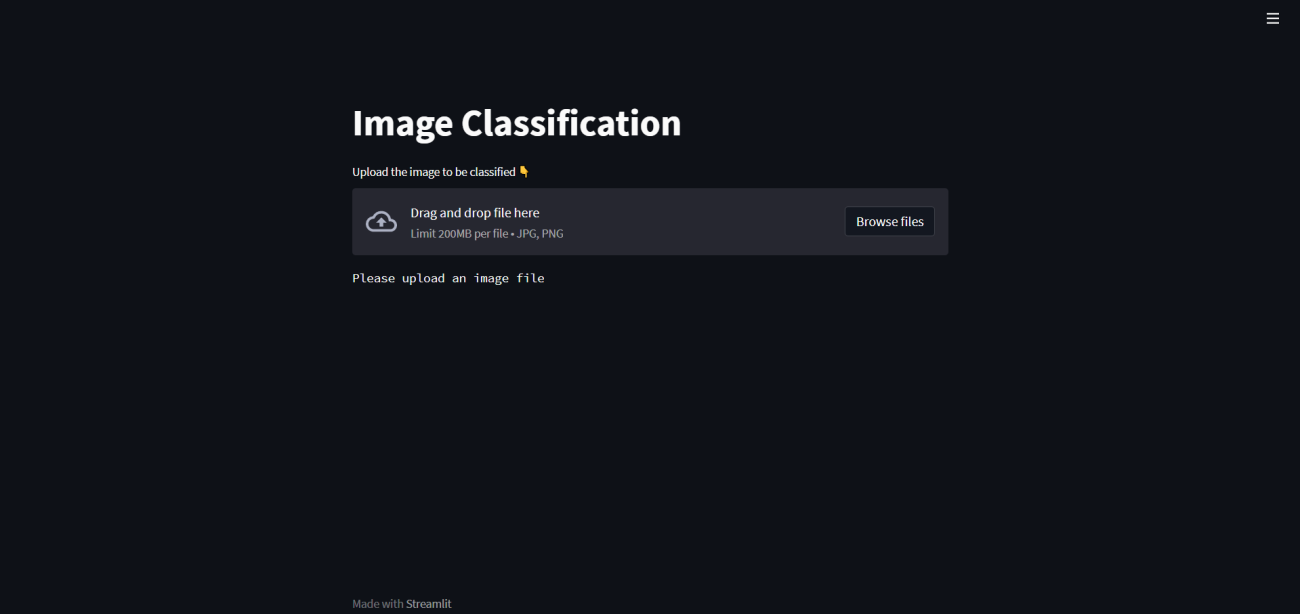
This code will generate a link. Copy-paste the link or click on the link, and it will redirect to a warning page related to phishing. Click on continue and the streamlit web application would start. The web application looks something like this.


Conclusion
A lot of time and effort takes to create a machine learning model. To showcase the efforts to the world one needs to deploy the model and demonstrate its capabilities. Streamlit is a powerful and simple-to-use platform that allows you to accomplish this even if you lack the necessary in-house technology or frontend expertise. With this article, we have understood the use of Streamlit in deploying a deep learning model.


