

Most current super-resolution methods rely on a pair of low and high-resolution images to train a network in a supervised manner. However, in real-world scenarios, such pairs are not available. Instead of directly addressing this problem, most tasks employ the popular bicubic down-sampling strategy to generate low-resolution images artificially. Unfortunately, this strategy introduces more artifacts, removing natural incense and other real-world characteristics. Moreover, super-resolution networks trained on such bicubic images suffer many struggles to generalize the natural images.
Single image super-resolution has fundamental low-level vision problems. The SISR aims to recover the High-Resolution images from a single Low-Resolution image. Various network architecture design and training strategies have continuously improved super-resolution performance, especially when it comes to Peak Single to Noise Ratio (PSNR).
PSNR is the most commonly used measure that measures the quality of reconstruction of lossy compressed images. The signal, in this case, is original image data noise is the error introduced by compression. Thus, while comparing the compressed images, PSNR is an approximation to human perception of reconstruction quality. Typical values of PSNR in lossy images vary between 30db to 50db, provided the bit depth is 8 bits. Thus, interpretation can be made like, higher the PSNR value better the reconstruction.
When the two images are identical, the absence of noise says the mean squared error is zero; for this case, PSNR is infinite.
These PSNR oriented approaches tend to make output over-smoothed without sufficient high-frequency details; the PSNR metric fundamentally disagrees with the subjective evaluation of human observers.
Today in this article, we will discuss the Enhanced Super Resolution GAN, an improved version of Super-Resolution GAN and its python code implementation.
Architecture & Method of ESRGAN
The model uses Residual-in-Residual block as a basic convolution block instead of a basic residual network or simple convolution trunk to provide a better flow gradient at the microscopic level. In addition to that, the model lacks a batch normalization layer in the generator to prevent smoothing out the artifacts in the images. This allows the ESRGAN to produce images with a higher approximation of the sharp edges of the image artifacts.
The ESRGAN uses a Relativistic discriminator to better approximate the probability of an image being real or fake; thus, the intern produces better results. The generator uses a linear combination of Perceptual difference between real and fake images using a pre-trained VGG19 network, Pixel wise absolute difference between real and fake images, and Relativistic average loss between real and fake images function during adversarial training.
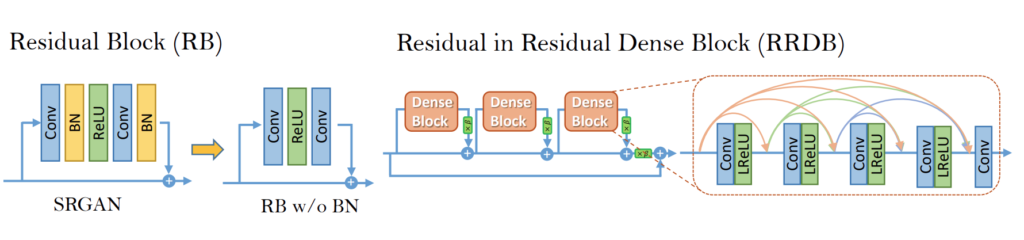
The above fig shows the proposed architectures; in this approach, the authors try to improve the quality of the recovered image given SRGAN by doing two main modifications in the generator’s structure: 1. Removes all batch normalization layer; 2. Replaces original basic blocks with a proposed residual-in-residual dense block, which combines multi-level residual network and dense connection as shown in the above figure.
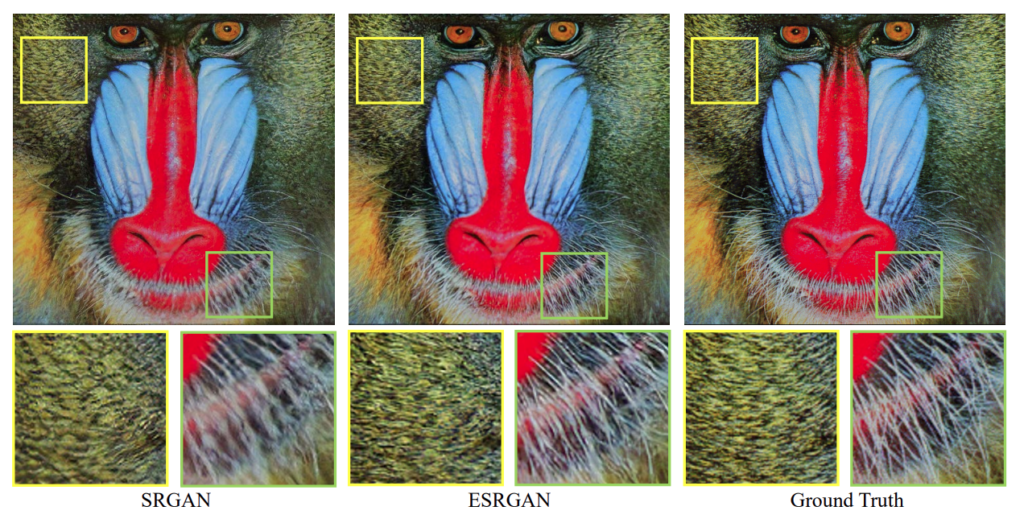
Result of this architecture from the research paper-
Code implementation of ESRGAN
The DIV2K dataset is used for training, which has a high quality 2K resolution dataset for image restoration tasks.
Import all dependencies:
 import os
 import time
 from PIL import Image
 import numpy as np
 import tensorflow as tf
 import tensorflow_hub as hub
 import matplotlib.pyplot as plt
 os.environ["TFHUB_DOWNLOAD_PROGRESS"] = "True"
Load the image as you want and paste the name in the variable below IMAGE_PATH
 # setting the image and its path
 IMAGE_PATH = 'images (2).jpg'
 SAVED_MODEL_PATH = "https://tfhub.dev/captain-pool/esrgan-tf2/1"
Helper functions:
Helper functions are used to reduce efforts when we are about to see the results. The helper is divided into three user-defined functions: preprocessing the input, the second one is to save the image, and the third one is for plot images.
 # function to preprocess image so that it can be handled by model
 def preprocess_image(image_path):
    '''Loads the image given make it ready for
       the model
       Args:
         image_path: Path to the image file
    '''
    image = tf.image.decode_image(tf.io.read_file(image_path))
    if image.shape[-1] == 4:
      image = image[...,:-1]
    size = (tf.convert_to_tensor(image.shape[:-1]) // 4) * 4
    image = tf.image.crop_to_bounding_box(image, 0, 0, size[0], size[1])
    image = tf.cast(image,tf.float32)
    return tf.expand_dims(image,0)
 def save_image(image,filename):
   '''
    Saves unscaled Tensor Images
    image: 3D image Tensor
    filename: Name of the file to be saved
   '''
   if not isinstance(image, Image.Image):
       image = tf.clip_by_value(image, 0, 255)
       image = Image.fromarray(tf.cast(image, tf.uint8).numpy())
   image.save('%s.jpg' % filename)
   print('Saved as %s.jpg' % filename)
 #%matplotlib inline
 def plot_image(image,title=''):
   '''
   plots the Image tensors
   image: 3D image Tensor
   title: Title for plot
   '''
   image = np.asarray(image)
   image = tf.clip_by_value(image, 0, 255)
   image = Image.fromarray(tf.cast(image, tf.uint8).numpy())
   plt.imshow(image)
   plt.axis('off')
   plt.title(title)
Inferencing the model:
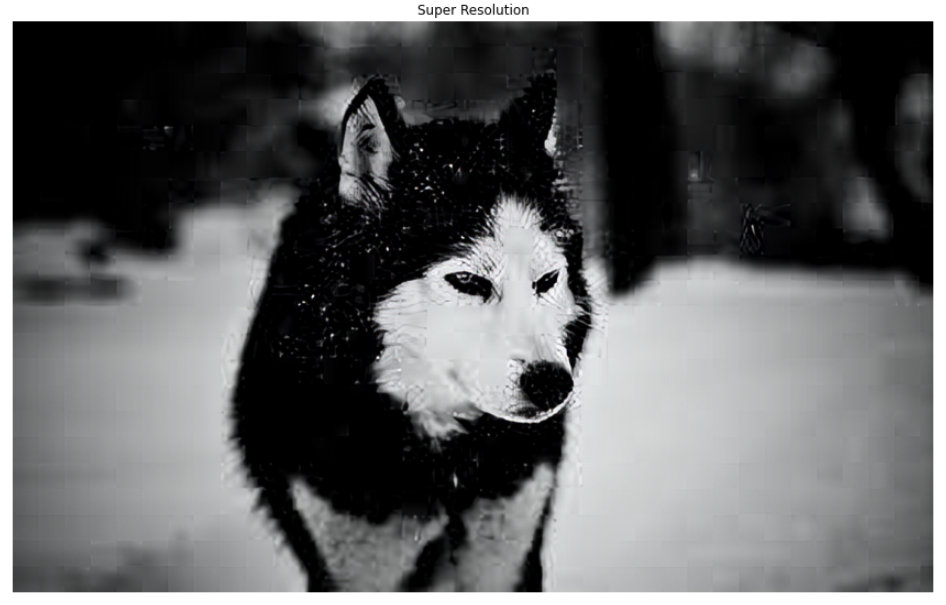
Perform Super resolution on images here loaded from path provided earlier.
 model = hub.load(SAVED_MODEL_PATH)
 load_image = preprocess_image(IMAGE_PATH)
 # plot original image
 plot_image(tf.squeeze(load_image),title='Original Photo')

 # Start Performing resolution
 start = time.time()
 super_image = model(load_image)
 super_image = tf.squeeze(super_image)
 print('Time taken to complete process: %f'%(time.time() - start))
 #plot the output image
 plot_image(tf.squeeze(super_image),'Super Resolution')
Evaluating Performance of the model:
 # Defining helper functions
 def downscale_image(image):
   """
       Scales down images using bicubic downsampling.
       Args:
           image: 3D or 4D tensor of preprocessed image
   """
   image_size = []
   if len(image.shape) == 3:
     image_size = [image.shape[1], image.shape[0]]
   else:
     raise ValueError("Dimension mismatch. Can work only on single image.")
   image = tf.squeeze(tf.cast(tf.clip_by_value(image, 0, 255), tf.uint8))
   lr_image = np.asarray(Image.fromarray(image.numpy()).resize([image_size[0] // 4, image_size[1] // 4],Image.BICUBIC))
   lr_image = tf.expand_dims(lr_image, 0)
   lr_image = tf.cast(lr_image, tf.float32)
   return lr_image
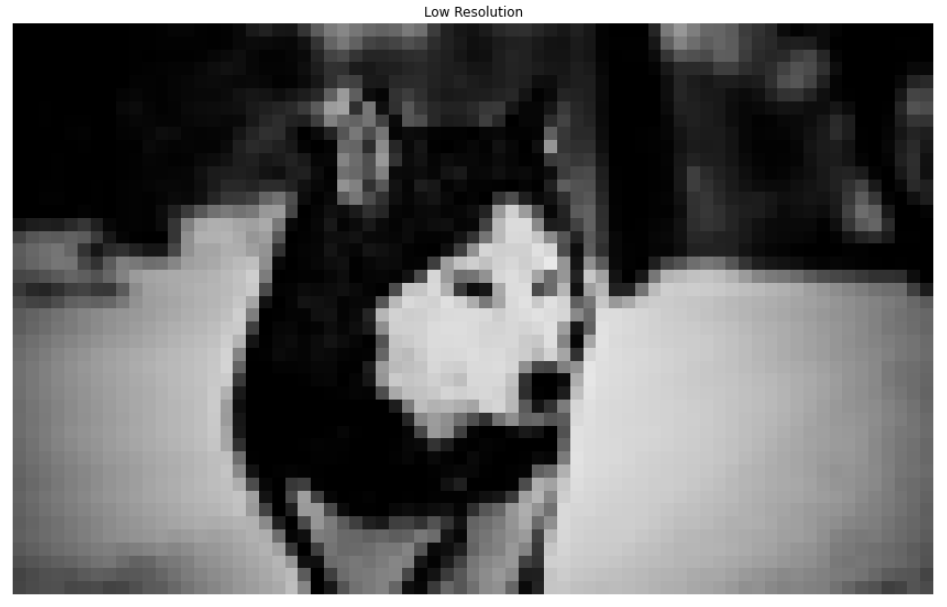
Performing bicubic downsampling and showcase the low-resolution image.
 hr_image = preprocess_image(IMAGE_PATH)
 lr_image = downscale_image(tf.squeeze(hr_image))
 plot_image(tf.squeeze(lr_image), title="Low Resolution")
Perform the super-resolution and showcase the output side by side i.e. original image, bicubic downsampled image and recovered image from downsampling.
 start = time.time()
 fake_image = model(lr_image)
 fake_image = tf.squeeze(fake_image)
 print("Time Taken: %f" % (time.time() - start))
Time Taken: 1.836289
 plt.rcParams['figure.figsize'] = [15, 10]
 fig, axes = plt.subplots(1, 3)
 fig.tight_layout()
 plt.subplot(131)
 plot_image(tf.squeeze(hr_image), title="Original")
 plt.subplot(132)
 fig.tight_layout()
 plot_image(tf.squeeze(lr_image), "x4 Bicubic")
 plt.subplot(133)
 fig.tight_layout()
 plot_image(tf.squeeze(fake_image), "Super Resolution")
 plt.savefig("ESRGAN_DIV2K.jpg", bbox_inches="tight")
 print("PSNR: %f" % psnr)
PSNR: 29.136759

Conclusion
In this article, we have seen how ESRGAN outperforms its earlier version, SRGAN, and practically we have seen how to implement this environment in your local machine. Furthermore, readers can directly play with this code by just changing the image in the IMAGE_PATH variable.