The ultrasonic sensor with Arduino allows us to measure distances through ultrasound. It is very common to find this type of sensor in today’s cars. The objective is to show how we can build real systems with this prototyping board. I will elaborate on the connection between the components and the code necessary to make it work.
How the Arduino ultrasonic sensor actually works

To measure distances with Arduino we can do it in different ways. There is the infrared sensor, which uses the properties of light to calculate distance, and the Arduino ultrasonic sensor uses the properties of sound propagation to measure distances. More specifically uses ultrasound. These types of sound waves are above the spectrum audible to humans.
The operation is very simple. The sensor sends an ultrasonic wave through the trigger, bounces off the object, and the receiver or echo detects the wave. Knowing how long this wave has taken to travel, we can know the distance.
You only need to use the famous speed formula:
Where s is speed, d the time traveled and t is time. If we clear the space, it would be as follows.
d = s x t
The value of speed is known to us as the sound travels at 343 meters per second. Time will be returned to us by the Arduino Ultrasonic Sensor via the Arduino API. With all this we can calculate how far an object is. [icon name = »lightbulb-o» class = »» unprefixed_class = »»] The speed of sound is 343 m / s at a temperature of 20º C. The speed increases or decreases 0.6 m / s per degree centigrade. We can be more exact if we use a temperature sensor like the LM35.
Therefore, it is important to know the frequencies of the audible spectrum. We should only stay with the frequency range of 20 Hz (hertz) to 20 kHz (kilohertz).
At around 20 Hz the sound is very low. As we go up the frequency, the sound becomes increasingly sharp. This will serve to alert us that we are approaching an obstacle when parking.
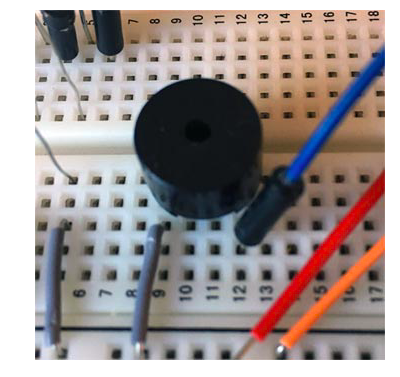
We can’t expect a hi-fi system with an Arduino buzzer either, but it does give us the ability to generate audible tones for alarms and even some easily recognizable musical tune.
Alert system with LEDs
Finally, we incorporated the visual alert system for the Arduino ultrasonic sensor. This allows us to visualize whether we are near or far from an obstacle. With 3 LEDs (green, yellow and red) we can determine if we are far, near or in a danger zone.
Necessary components
The following list shows you all the necessary material.
- Arduino UNO
- Breadboard where we will connect the components
- Cables to make connections
- 3 220 Ω resistors
- 1 green LED
- 1 yellow LED
- 1 red LED
- 1 Arduino Ultrasonic Sensor (HC-SR04)
- 1 buzzer
- Ultrasonic sensor, mounting circuit
It is a very simple circuit. On the one hand, we will have all the alerts, acoustic and visual, and on the other hand the ultrasound sensor. In the following diagram the connection can be observed.
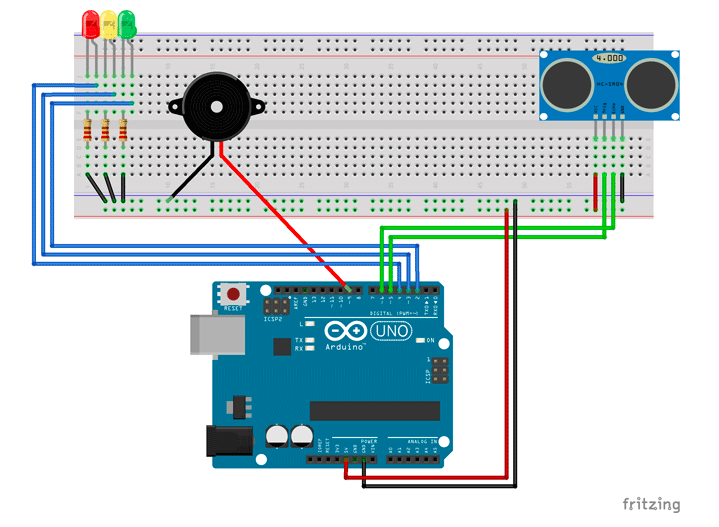
Things to keep in mind: The resistors are 220 Ω and are placed in series with the LEDs. The Arduino ultrasonic sensor connects to two digital pins, one for the trigger and one for the echo or receiver. The Arduino buzzer connects to a PWM output. [icon name = »exclamation-triangle» class = »» unprefixed_class = »»] Try to put the Arduino ultrasonic sensor as close to the edge of the breadboard as possible.
Programming the Arduino ultrasonic sensor to measure distance
Let’s start with the programming part. The first is a brief description of what we want to achieve. This will help us to pose the general problem and then break it down into smaller pieces. This is called computational thinking, which involves logic, assessment, patterns, automation, and generalisation.
The parking system consists of detecting an object through the ultrasonic sensor and warning with light and sound signals. Therefore, we already have the first division, detect the obstacle and alerts with sound and lights.
Threshold 1: it is in the green zone from 30 cm to 20 cm.
Threshold 2: it is in the yellow zone, from 20 cm to 10 cm.
Threshold 3: it is in the red zone, less than 10 cm.
[icon name = »exclamation-triangle» class = »» unprefixed_class = »»] It is important to know the operating range of the ultrasound sensor. It normally ranges from 2 cm to 400 cm.
Code:
// Pins used
#define LEDGREEN 2
#define LEDYELLOW 3
#define LEDRED 4
#define TRIGGER 5
#define ECHO 6
#define BUZZER 9
// Constants
const float sound = 34300.0; // Sound speech in cm/s
const float threshold 1 = 30.0;
const float threshold 2 = 20.0;
const float threshold 3 = 10.0;
void setup() {
// Initiate mounting circuit
Serial.begin(9600);
// Modo entrada/salida de los pines
pinMode(LEDGREEN, OUTPUT);
pinMode(LEDYELLOW, OUTPUT);
pinMode(LEDRED, OUTPUT);
pinMode(ECHO, INPUT);
pinMode(TRIGGER, OUTPUT);
pinMode(BUZZER, OUTPUT);
// Turn off the LEDs
turnoffLEDs();
}
void loop() {
// Prepare Ultrasonic sensor
initiateTrigger();
// Obtain distance
float distance = calculatedistance ();
// Turn off LEDs
turnoffLEDs();
// Alert if within danger zone
if (distance < threshold 1)
{
// Launch alerts
alerts(distance);
}
}
// Turn off LEDs
void turnoffLEDs()
{
// Turn off LEDs
digitalWrite(LEDGREEN, LOW);
digitalWrite(LEDYELLO, LOW);
digitalWrite(LEDRED, LOW);
}
// Check if any visual or sound alert is required
void alerts (float distance)
{
if (distance < threshold 1 && distance >= threshold 2)
{
// Turn on LED Green
digitalWrite(LEDGREEN, HIGH);
tone(BUZZER, 2000, 200);
}
else if (distance < threshold2 && threshold > threshold3)
{
// Turn on LED yellow
digitalWrite(LEDYELLOW, HIGH);
tone(BUZZER, 2500, 200);
}
else if (distance <= threshold3)
{
// Turn on LED red
digitalWrite(LEDRED, HIGH);
tone(BUZZER, 3000, 200);
}
}
// Calculate distance between sound and the object
float calculatedistance()
{
unsigned long time = pulseIn(ECHO, HIGH);
float distance = time* 0.000001 * sound / 2.0;
Serial.print(distance);
Serial.print(“cm”);
Serial.println();
delay(500);
return distance;
}
void initiateTrigger()
{
digitalWrite(TRIGGER, LOW);
delayMicroseconds(2);
digitalWrite(TRIGGER, HIGH);
delayMicroseconds(10);
digitalWrite(TRIGGER, LOW);
}