

|
Listen to this story
|
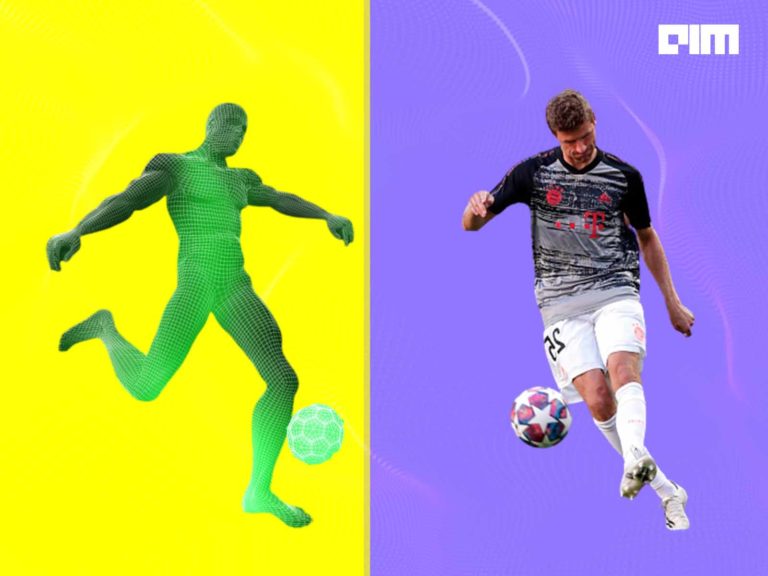
Rendering is a fundamental component of computer graphics that transforms 3D models into 2D pictures. It’s a natural technique to bridge the gap between 3D scene attributes and 2D picture pixels. This article focuses on rendering texture meshes to build a three-dimensional image with Pytorch 3d library. Following are the topics to be covered.
Table of contents
- About Pytorch3D
- Rendering images with Pytorch3D
- Installing Pytorch3D
- Import necessary libraries
- Loading mesh and texture
- Build a renderer
- Plot the rendered image
- Modifying viewing angle
Three-dimensional comprehension is critical for enhancing AI systems’ capacity to comprehend and act in the real world. Let’s start by talking about Pytorch3D.
About Pytorch3D
PyTorch3D is a highly modular and efficient toolkit with unique characteristics that make 3D deep learning with PyTorch simpler. PyTorch3D provides a collection of frequently used fast and differentiable 3D operators and loss functions for 3D data, as well as a modular differentiable rendering API, allowing researchers to immediately incorporate these functions into current state-of-the-art deep learning systems.
A detailed understanding of the Pytorch 3D and the functionality of the library could be found here.
Are you looking for a complete repository of Python libraries used in data science, check out here.
Rendering images with Pytorch3D
In this article, we will load the mesh and textures of an image to create a 3D impression of the image using the Pytroch 3D library.
A mesh model is made up of vertices, edges, and faces that describe a 3D shape using polygonal representation, such as triangles and quadrilaterals. Mesh, unlike solid objects, has no mass attributes. However, just like 3D objects, simple mesh shapes such as boxes, cones, and pyramids may be created.
An image texture is a set of metrics computed in image processing to quantify an image’s apparent texture. Image texture informs us about the spatial organisation of colours or intensities in an image or a specific part of an image.
Let’s start with installing and checking important libraries.
Installing Pytorch3D
Installing check for torch and torchvision by using this code. Most probably if using a colab notebook under no particular environment these would be present in the bin.
!pip show torch
!pip show torchvision
Moving to the next part which is installing Pytorch3D, it needs to be installed from the Facebook research GitHub repository and with particular dependencies.
import os
import sys
import torch
need_pytorch3d=False
try:
    import pytorch3d
except ModuleNotFoundError:
    need_pytorch3d=True
if need_pytorch3d:
    if torch.__version__.startswith("1.11.") and sys.platform.startswith("linux"):

        pyt_version_str=torch.__version__.split("+")[0].replace(".", "")
        version_str="".join([
            f"py3{sys.version_info.minor}_cu",
            torch.version.cuda.replace(".",""),
            f"_pyt{pyt_version_str}"
        ])
        !pip install fvcore iopath
        !pip install --no-index --no-cache-dir pytorch3d -f https://dl.fbaipublicfiles.com/pytorch3d/packaging/wheels/{version_str}/download.html
    else:

        !curl -LO https://github.com/NVIDIA/cub/archive/1.10.0.tar.gz
        !tar xzf 1.10.0.tar.gz
        os.environ["CUB_HOME"] = os.getcwd() + "/cub-1.10.0"
        !pip install 'git+https://github.com/facebookresearch/pytorch3d.git@stable'
Importing necessary libraries
import matplotlib.pyplot as plt

from pytorch3d.io import load_objs_as_meshes, load_obj

from pytorch3d.structures import Meshes
from pytorch3d.vis.plotly_vis import AxisArgs, plot_batch_individually, plot_scene
from pytorch3d.vis.texture_vis import texturesuv_image_matplotlib
from pytorch3d.renderer import (
    look_at_view_transform,
    FoVPerspectiveCameras,
    PointLights,
    DirectionalLights,
    Materials,
    RasterizationSettings,
    MeshRenderer,
    MeshRasterizer,
    SoftPhongShader,
    TexturesUV,
    TexturesVertex
)
Since using a colab notebook we need to fetch the utilise files from the GitHub source.
!wget https://raw.githubusercontent.com/facebookresearch/pytorch3d/main/docs/tutorials/utils/plot_image_grid.py
from plot_image_grid import image_grid
Loading mesh and texture
The mesh and textures files used for this article are present in the Facebook research GitHub repository. So directly downloading the files from the repository or it could be manually downloaded and uploaded in the colab notebook.
!mkdir -p data/cow_mesh
!wget -P data/cow_mesh https://dl.fbaipublicfiles.com/pytorch3d/data/cow_mesh/cow.obj
!wget -P data/cow_mesh https://dl.fbaipublicfiles.com/pytorch3d/data/cow_mesh/cow.mtl
!wget -P data/cow_mesh https://dl.fbaipublicfiles.com/pytorch3d/data/cow_mesh/cow_texture.png
Once downloaded the mesh and texture files needed to be read.
f torch.cuda.is_available():
    device = torch.device("cuda:0")
    torch.cuda.set_device(device)
else:
    device = torch.device("cpu")

DATA_DIR = "./data"
obj_filename = os.path.join(DATA_DIR, "cow_mesh/cow.obj")

mesh = load_objs_as_meshes([obj_filename], device=device)
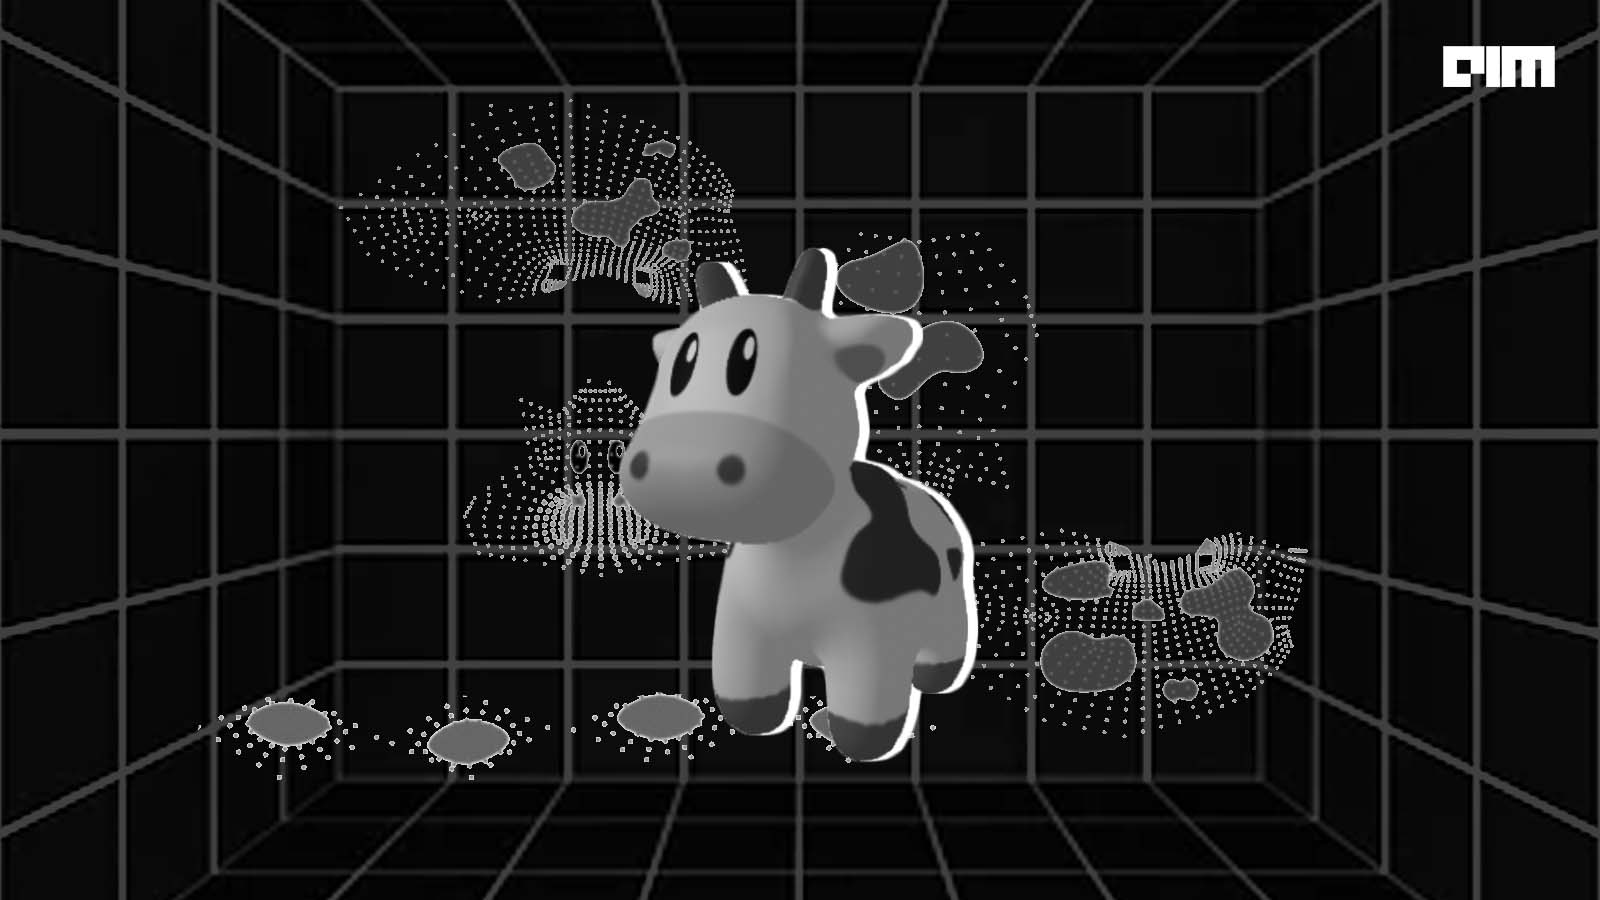
Plotting the mesh and texture file
plt.figure(figsize=(7,7))
texturesuv_image_matplotlib(mesh.textures, subsample=None)
plt.axis("off");

Build a renderer
R, T = look_at_view_transform(2.7, 0, 180)
cameras = FoVPerspectiveCameras(device=device, R=R, T=T)

raster_settings = RasterizationSettings(
    image_size=512,
    blur_radius=0.0,
    faces_per_pixel=1,
)


lights = PointLights(device=device, location=[[0.0, 0.0, -3.0]])

renderer = MeshRenderer(
    rasterizer=MeshRasterizer(
        cameras=cameras,
        raster_settings=raster_settings
    ),
    shader=SoftPhongShader(
        device=device,
        cameras=cameras,
        lights=lights
    )
)
As in the above image of the texture, there are pieces of the 3D model with the help of which the 3D model of a cow would be created.
Initially, a camera needed to be set up. The front of the cow is facing the -Z direction, with world coordinates +Y up, +X left, and +Z in. So we rotate the camera 180 degrees in the azimuth direction to face the front of the cow.
- On an azimuth circle, azimuth is the direction measured in degrees clockwise from north. An azimuth circle has 360 degrees. 90 degrees represent east, 180 degrees represent the south, 270 degrees represent the west, and 360 degrees and 0 degrees represent the north.
Set the rasterization and shading options. Since we are simply producing pictures for display, we will set faces per pixel as 1 and the blur radius is 0.0. We also set bin size and max faces per bin to none to employ the speedier coarse-to-fine rasterization approach.
Combine a rasterizer with a shader to make a Phong renderer. The textured Phong shader will interpolate the texture UV coordinates for each vertex, take a texture image sample, and apply the Phong lighting model.
Plot the rendered image
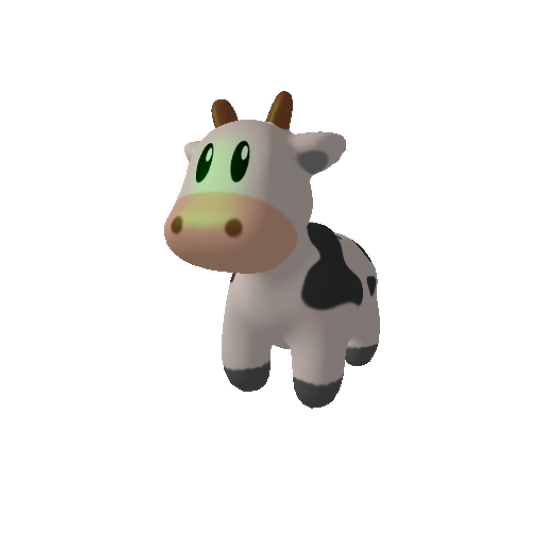
rendered_image = renderer(mesh)
plt.figure(figsize=(10, 10))
plt.imshow(rendered_image[0, ..., :3].cpu().numpy())
plt.axis("off");
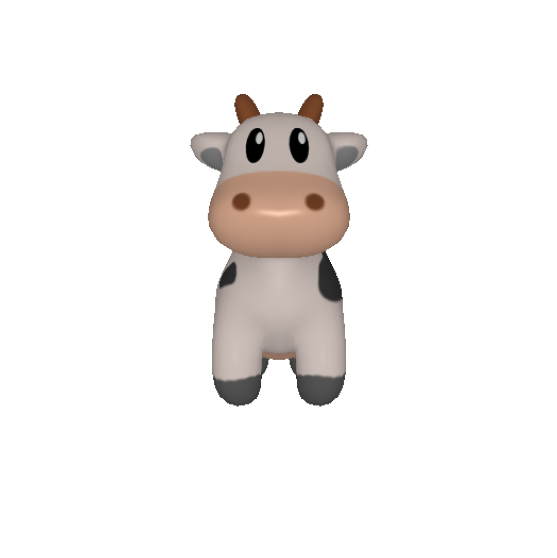
This is the final 3D rendered image which is made from the mesh and texture files. Its viewing angle and position could also be changed and the impact of lighting could be modulated.
Modifying viewing angle
R, T = look_at_view_transform(dist=2.7, elev=10, azim=-150)
cameras = FoVPerspectiveCameras(device=device, R=R, T=T)

lights.location = torch.tensor([[2.0, 2.0, -2.0]], device=device)

materials = Materials(
    device=device,
    specular_color=[[0.0, 1.0, 0.0]],
    shininess=10.0
)

images = renderer(mesh, lights=lights, materials=materials, cameras=cameras)
plt.figure(figsize=(10, 10))
plt.imshow(images[0, ..., :3].cpu().numpy())
plt.axis("off");
Conclusion
PyTorch3D provides a collection of frequently used fast and differentiable 3D operators and loss functions for 3D data. It also provides a modular differentiable rendering API. With this article, we have understood the use of Pytorch 3D for rendering 3D images with their mesh and textures.