|
Listen to this story
|
There are many tools available that help in building state of the art computer vision applications. Some of the tools provide pre-built applications with no option of customization while some provide options to build your applications from scratch. To detect objects in images, there are many tools and packages available. Now if we need to build an object detection model for our own requirements, it becomes a challenge. Detecto, a package in python provides features to build custom object detection models as per the requirements. In this article, we are going to discuss how we can build the custom object detention models using Detecto. The major points to be discussed in this article are listed below.
Table of content
- What is Detecto?
- Building custom object detection model
- Importing data
- Preprocessing data
- Model training
- Predicting object labels
Let’s start with understanding Detecto.
What is Detecto?
Detecto is an open-source library for computer vision programming that helps us in fitting state-of-the-art computer vision and object detection models into our image data. One of the great things about this package is we can fit these models using very few lines of code. In the examples, they have shown us how we can fit these models using only four or five lines of code.
There are various features like making inferences using still images and videos or fitting transfer learning models using our custom data that come with this library. Pytorch is the library that is the base for the Detecto library so it becomes easy for us to transfer models between these libraries. From a basic implementation to application, advanced technologies in computer vision projects can be performed using this library. We can simply install the Detecto library in our environment using the following lines of codes.
!pip install detecto
In the installation, we also find that this library also includes computer vision libraries such as open-cv, torchvision, and pillow.
One most important thing is that we can train our computer vision models in both CPU and GPU but it is suggested to use GPU for training computer vision models so that process can get faster because the size of the models is so much higher.
Are you looking for a complete repository of Python libraries used in data science, check out here.
Building a custom object detection model
This library claims that we can train a model on the custom dataset using the below 5 lines of codes
from detecto.core import Model, Dataset

dataset = Dataset('custom_dataset/')

model = Model(['dog', 'cat', 'rabbit'])
model.fit(dataset)

model.predict(...)
Where in the first line we are importing the model and dataset module. The second line is for defining the instance of data, the third line is for instantiating the models and the fourth line is to train or fit the model into data and the last line will tell us the prediction of the model.
Let’s try this library once because there are various features in the library instead of those given in the above section.
Importing data
In this section, we are going to see how we can use this library for making an image classifier trained on a dataset. So before starting anything we are required to acquire a dataset and I have got a dataset of images of dogs from here. This dataset is already labelled by the developers of the Detecto and we just need to import this into our environment. This dataset has 300 labelled images of golden retrievers and chihuahuas dogs. Let’s get the data first.
I have downloaded the data from this link and uploaded it into my drive. To read this I have uploaded it into the drive and will read this data after mounting the drive on the notebook. Mounting can be done using the following lines of codes.
from google.colab import drive
drive.mount('/content/drive')
Now let’s set the directory as the working directory where we have uploaded the data
import os
os.chdir('/content/drive/MyDrive/Yugesh/Object detection with 5 lines of code using Detecto/dog_dataset')
Let’s check the folder which we have got from our uploading.
!ls
Output:

Here we can see that we have three folders and one file in our directory. Let’s check the content of every folder.
!ls images
Output:
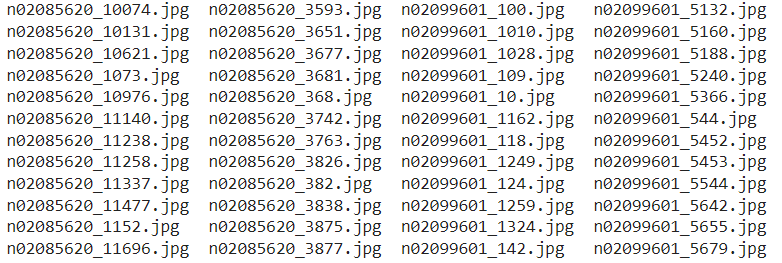
This is how images are there in the images folder.
!ls train_labels
Output:

The above output represents the XML files we have in the train_lables folder.
!ls val_labels
Output:

The above output represents the XML files we have in the val_lables folder. With this library, we have got utlis that can be used to convert XML files into CSV files.
from detecto import utils
detecto.utils.xml_to_csv('train_labels', 'train.csv')
detecto.utils.xml_to_csv('val_labels', 'val.csv')
Output:

Here we have converted the labels XML into CSV. Let’s visualize an image from the image data.
import matplotlib.pyplot as plt
import matplotlib.image as img
image = img.imread('images/n02085620_8611.jpg')
plt.imshow(image)
plt.show()
Output:
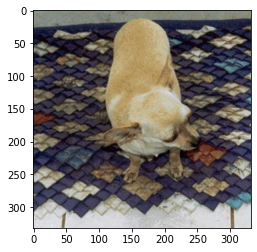
Here we can see most of the details of our acquired data.
Preprocess data
To work with this library we are required to preprocess data according to the utilities of the library. In this section, we will look at how we can do this using the Detecto library. In this section we will perform the following preprocessing:
- Transformation of image
- Combining images and labels
- Image labelling
Let’s start with the transformation of images
from torchvision import transforms
from detecto import core
transform_img = transforms.Compose([
    transforms.ToPILImage(),
    transforms.Resize(800),
    transforms.RandomHorizontalFlip(0.5),
    transforms.ToTensor(),
    utils.normalize_transform(),
])
Now using the above function and core function of Detecto, let’s transform images and combine and label the train images.
dataset = detecto.core.Dataset('train.csv', 'images/', transform=transform_img)Here we have performed most of the preprocessing using one line of code. Let’s visualize one labeled image.
from detecto import visualize
image, information = dataset[50]
detecto.visualize.show_labeled_image(image, information['boxes'], information['labels'])
Output:

Here in the above codes, we can see how we use Detecto for the visualization of images and preprocessing the images.
Model training
After preprocessing the data, we are ready to train our model. In this article, we are going to use the Faster-RCNN-resnet50 model on our data. The training process can be completed in the following two steps.
- Instantiating data loader
- Instantiating and fitting models.
Instantiating data loader
To fit the data into the model we are required to instantiate an object as our loader that can hold the data. Using the below code we can do this.
dataloader = detecto.core.DataLoader(dataset)
dataloader
Output:

Here we can see that the above object is a Detecto.core module.
Instantiating and fitting model
In this section, we will feed the data loader instance to the image classifier. To measure the accuracy we are required to put labels in our validation image data. That can be using the following codes.
validation_data = detecto.core.Dataset('val.csv', 'images/')
Now we are required to make the model know what are the categories we have in the data. We can do this while instantiating the model.
categories = ['Chihuahua', 'golden_retriever']
classifier = core.Model(categories)
Output:

Now we are ready to fit this model into our training data and validation data.
history = classifier.fit(dataloader, validation_data, epochs = 20, verbose = True)
Output:

In the output, we can see that we have trained our model using 20 epochs. Let’s plot the losses from the model.
plt.plot(history)
Output:
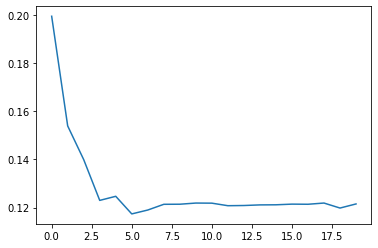
Here we can see the loss of the models has decreased with the epochs.
Predicting object labels
Now we can plot object label predictions using our trained model. For this, we will first extract some images from the data using the following codes.
images = []
for i in range(0,36,3):
  image,_ = validation_data[i]
  images.append(image)
image.shape
Output:

Now we can use Detecto to visualize the images.
visualize.plot_prediction_grid(classifier, images, dim=(4, 3), figsize=(16, 12))
Output:

In the above output, we can see how the model has detected and assigned a label for the objects present in the images.
Final words
In this article, we have discussed Detecto which is a library for computer vision programming and modeling easily and efficiently. Along with this, we have seen how we can use it for building a custom object detention model quickly and easily. We built an object detection model and tested it for predicting the labels of the objects present in the images.