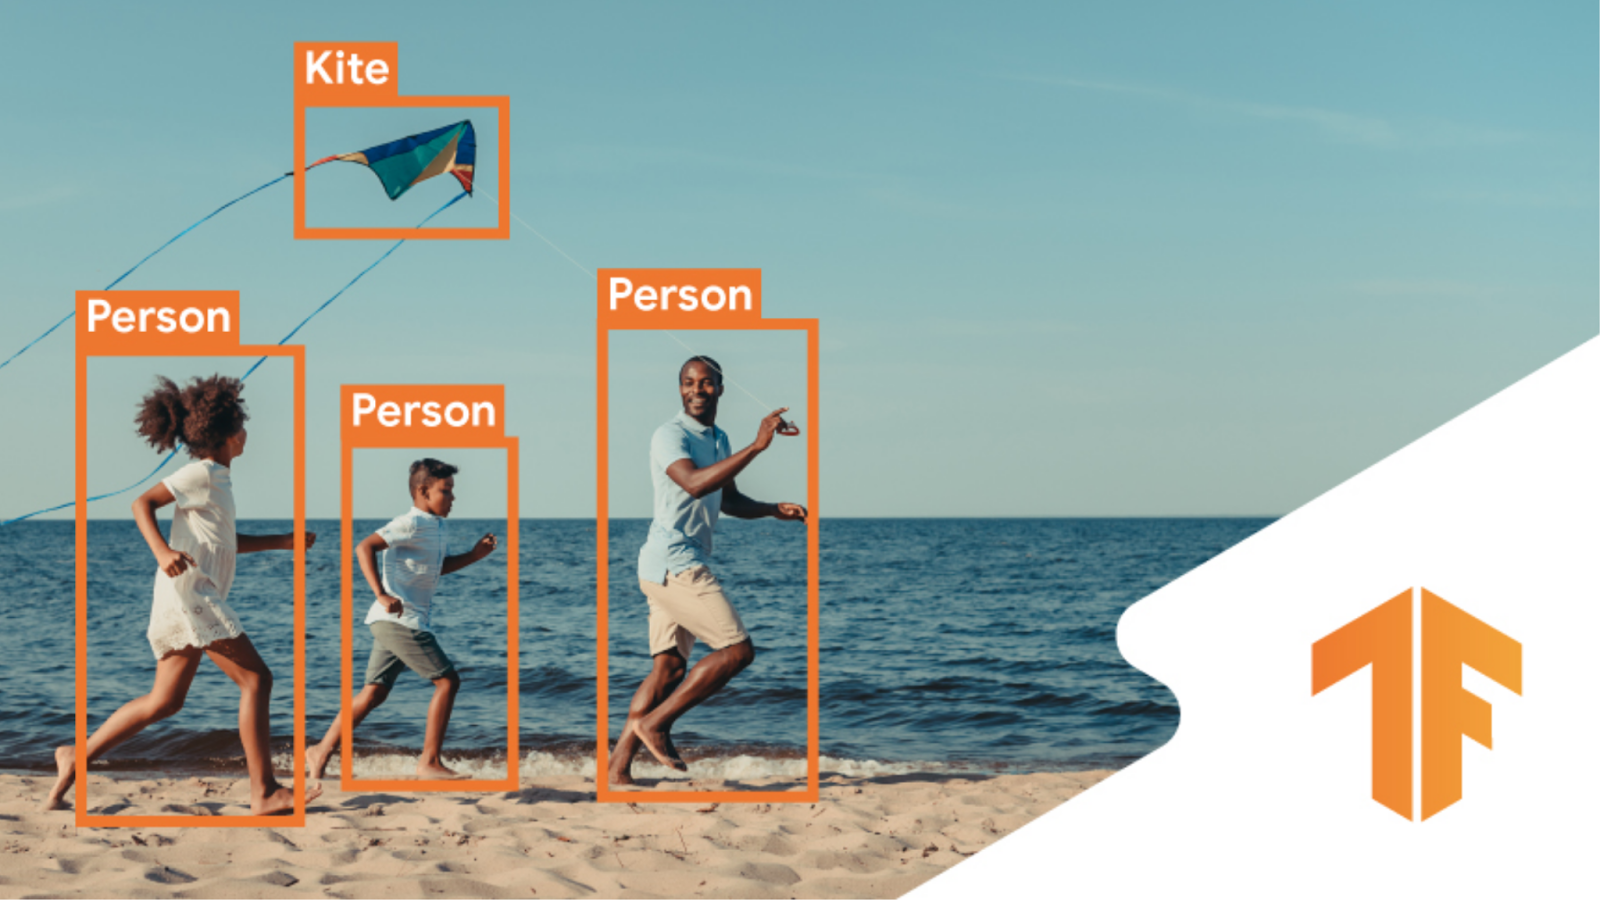
Object detection is the process of classifying and locating objects in an image using a deep learning model. Object detection is a crucial task in autonomous Computer Vision applications such as Robot Navigation, Self-driving Vehicles, Sports Analytics and Virtual Reality.
Locating objects is done mostly with bounding boxes. Instance segmentation masks and key points are also used separately for locating objects or along with bounding boxes. A bounding box is a simple rectangle box that bounds an object. Representation of bounding boxes is standardized for interchangeability and reproducibility of object detection datasets and object detection models. One of the famous and widely used bounding box formats is COCO format. This format was introduced by the “Common Objects in Context” dataset, which is a huge collection of annotated images prepared exclusively for object detection. This format describes a bounding box with four parameters as [top_left_x, top_left_y, width, height].
In this article, we discuss how to perform Object Detection with a pre-trained EfficientDet model using TensorFlow. Google’s EfficientDet is one of the famous object detection models. This model is trained on the popular COCO2017 dataset. This dataset has around 160,000 images that contain 80 classes. The EfficientDet model’s training checkpoints are available open-source and can be readily implemented in any custom detection model via transfer learning.
This article assumes that the readers understand the fundamentals of deep learning, computer vision, image segmentation, and transfer learning. Nevertheless, the following articles may instantly fulfill the prerequisites:
- Getting Started With Deep Learning Using TensorFlow Keras
- Getting Started With Computer Vision Using TensorFlow Keras
- Exploring Transfer Learning Using TensorFlow Keras
- Getting Started with Semantic Segmentation Using TensorFlow Keras
Let’s dive deeper into hands-on learning.
Object Detection API
TensorFlow’s Object Detection API is a useful tool for pre-processing and post-processing data and object detection inferences. Its visualization module is built on top of Matplotlib and performs visualizations of images along with their coloured bounding boxes, object classes, keypoints, instance segmentation masks with fine control. Here, we use this API for post-processing the inference results and visualize the results.
Download the API from its source repository.
!git clone --depth 1 https://github.com/tensorflow/models
Output:
This clone brings many TensorFlow models at once. Install Object Detection API and its dependencies using the following commands.
 %%bash
 sudo apt install -y protobuf-compiler
 # change directory
 cd models/research/
 protoc object_detection/protos/*.proto --python_out=.
 cp object_detection/packages/tf2/setup.py .
 # install dependencies
 python -m pip install .
A portion of the output:
Create the environment
Import necessary libraries, frameworks and modules.
 import matplotlib
 import matplotlib.pyplot as plt
 import cv2
 import numpy as np
 import tensorflow as tf
 import tensorflow_hub as hub

 from object_detection.utils import label_map_util
 from object_detection.utils import visualization_utils as viz_utils
 from object_detection.utils import ops as utils_ops
 %matplotlib inline
Prepare EfficientDet Model
Load the pre-trained model with weights from the TensorFlow Hub.
 model_url = 'https://tfhub.dev/tensorflow/efficientdet/d0/1'
 efficientdet = hub.load(model_url)
The model is completely ready for deployment or inference. TensorFlow Hub has a great collection of ready-to-deploy pre-trained models. Models and their checkpoints can be loaded with a single line of code.
Prepare some Data for Inference
Download some image data to perform inference. The following data source contains open-source images, each contains multiple objects suitable for detection. Clone the source and download the data into the local (or virtual) machine.
!git clone https://github.com/RajkumarGalaxy/dataset.git
Output:
Read the images and save them in the required format in a list. EfficientDet receives input images in the shape of [1, 512, 512, 3]. It does not support batching. It receives images one by one. The shape supported by our version is 512 by 512 pixels. There are other versions of EfficientDet that support 640 by 640, 768 by 768, 1024 by 1024, and so on. Each image should be in 3 colour channels. If a grayscale image is used, it should be modified to the required shape format.
 images = []
 # Read 10 images from the downloaded dataset
 for i in range(1,11):
     url = './dataset/Images/%03d.jpg'%i
     img = cv2.imread(url)
     # cv2 reads image in BGR format
     # convert BGR into RGB
     img = cv2.cvtColor(img, cv2.COLOR_BGR2RGB)
     # EfficientDet expects 512 by 512
     img = tf.image.resize(img, (512,512))
     # EfficientDet expects uint8
     img = tf.cast(img, tf.uint8)
     # EffiencientDet expects [1,512,512,3]
     img = tf.expand_dims(img, axis=0)
     images.append(img)
Check the image shape.
images[0].shape
Output:
Sample an image and visualize it.
 img = images[0].numpy().reshape(512,512,3)
 plt.figure(figsize=(8,6))
 plt.imshow(img)
 plt.axis('off')
 plt.colorbar()
 plt.show()
Output:
The pixel values range from 0 to 255. EfficientDet expects images not to be scaled or normalized. Hence, our data is ready for inference.
Visualize all our test images. There are 10 images in our test data.
 plt.figure(figsize=(8,20))
 for i in range(10):
     img = images[i].numpy().reshape(512,512,3)
     plt.subplot(5,2,i+1)
     plt.imshow(img)
     plt.axis('off')
 plt.show()
Output:
Inference – Object Detection
Perform inference with the EfficientDet Model on the pre-processed image data.
 results = []
 # infer and save results in a list
 for i in range(10):
     res = efficientdet(images[i])
     results.append(res)
 # what results do we obtain?
 results[0].keys()
Output:
Out of these results, we are interested in detection_boxes, detection_classes, and detection_scores required to visualize the detections.
During inference, classified objects are reported as integers. The following helper method obtains the original class name against the class numbers from the originally trained dataset.
 label = './models/research/object_detection/data/mscoco_label_map.pbtxt'
 category = label_map_util.create_category_index_from_labelmap(label,
                                     use_display_name=True)
Visualize Object Detection Results
Define a helper function that displays the input images and results on top of them. The bounding boxes, locations, class name, and colour are extracted from the results and displayed as images.
 def display_detections(image, result):
     result = {key:val.numpy() for key,val in result.items()}
     viz_utils.visualize_boxes_and_labels_on_image_array(
       image,
       result['detection_boxes'][0],
       result['detection_classes'][0].astype(int),
       result['detection_scores'][0],
       category,
       use_normalized_coordinates=True,
       max_boxes_to_draw=200,
       min_score_thresh=.30,
       agnostic_mode=False,
       keypoints=None,
       keypoint_scores=None,
       keypoint_edges=None)
     plt.figure(figsize=(10,10))
     plt.imshow(image)
     plt.axis('off')
     plt.show()
Display the input images along with inferences made on them.
 for i in range(10):
     img = images[i].numpy().copy()[0]
     res = results[i]
     display_detections(img, res)
Output:
This notebook contains the above code implementation.
Wrapping Up
In this article, we have discussed object detection and its standard data formats. We have discussed an object detection model implementation with the famous EfficientDet model pre-trained on COCO 2017 dataset. We have learnt to perform object detection by loading a pre-trained model and its checkpoints, inferencing test images, post-processing the results and visualizing the detections with bounding boxes.
Interested readers can choose a different version of the EfficientDet model or a different model (such as CenterNet, Faster R-CNN, Mask R-CNN and SSD), preprocess the data according to the model’s requirements and perform inference on their own data.


